
Remove sky glow
Light pollution reduction estimates the smooth glow covering the sky and subtracts it from the image. It can help remove an artificial-light cast and make stars easier to distinguish from the background. Unlike lowering Blacks, it tries to correct that colored background before you finish the tones.
- Select a representative original and review its mask to include sky while protecting ground, trees and buildings.
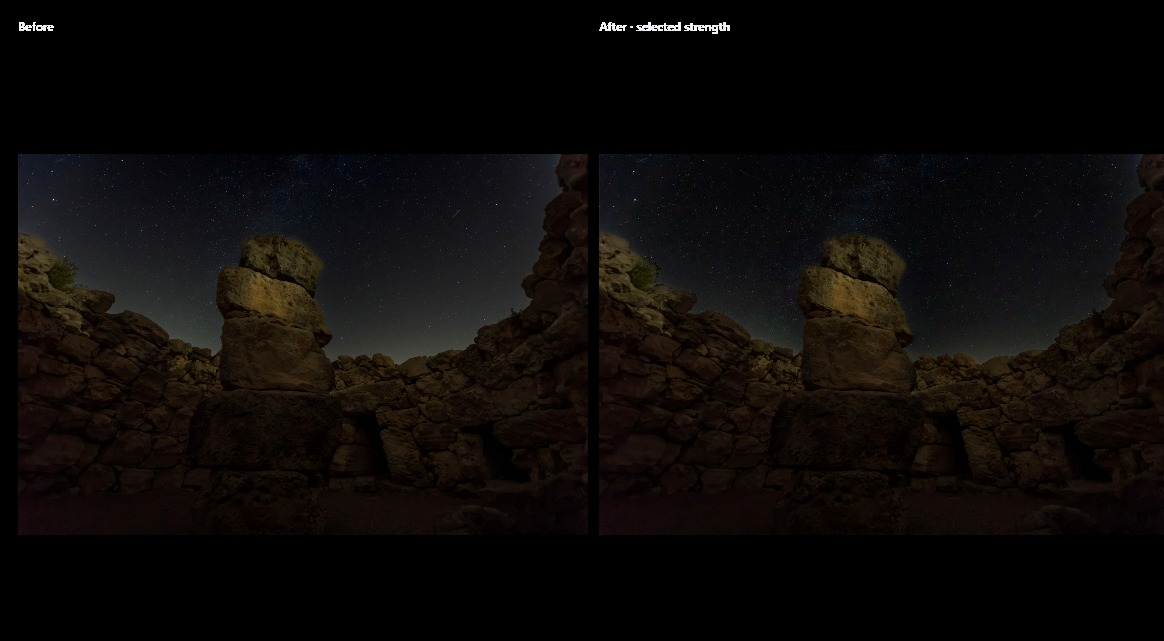
- Compare before/after at 60% as a first trial. Inspect stars, the gradient near the horizon and diffuse structure.
- Lower Strength if nebulosity disappears, blotches develop or the background looks empty. Increase gradually only if an unwanted smooth cast remains.
- Use Sky gain to restore brightness after subtraction or lower it if the sky remains too bright. Gain cannot substitute for a correct mask.
- Adjust Sky transition if a seam appears near the horizon. Too much transition can leave a weakly corrected strip; too little can expose an edge.
- Enable correction, restack or regenerate video and compare the complete result. The comparison window can show the effect before application is enabled.
For a stable series, enable linking after preparing the source photo and inspecting destinations. Pollution linking also copies the mask; do not leave it active when each photo needs different geometry. A preset keeps values but does not replace destination masks. Review Trails and Timelapse separately.
Zero Strength with nonzero gain still changes the sky when the module is enabled. Disable the module for a comparison without any of its effects. Always inspect real structures such as the Milky Way and clouds before accepting strong reduction.
Mask, gain and transition
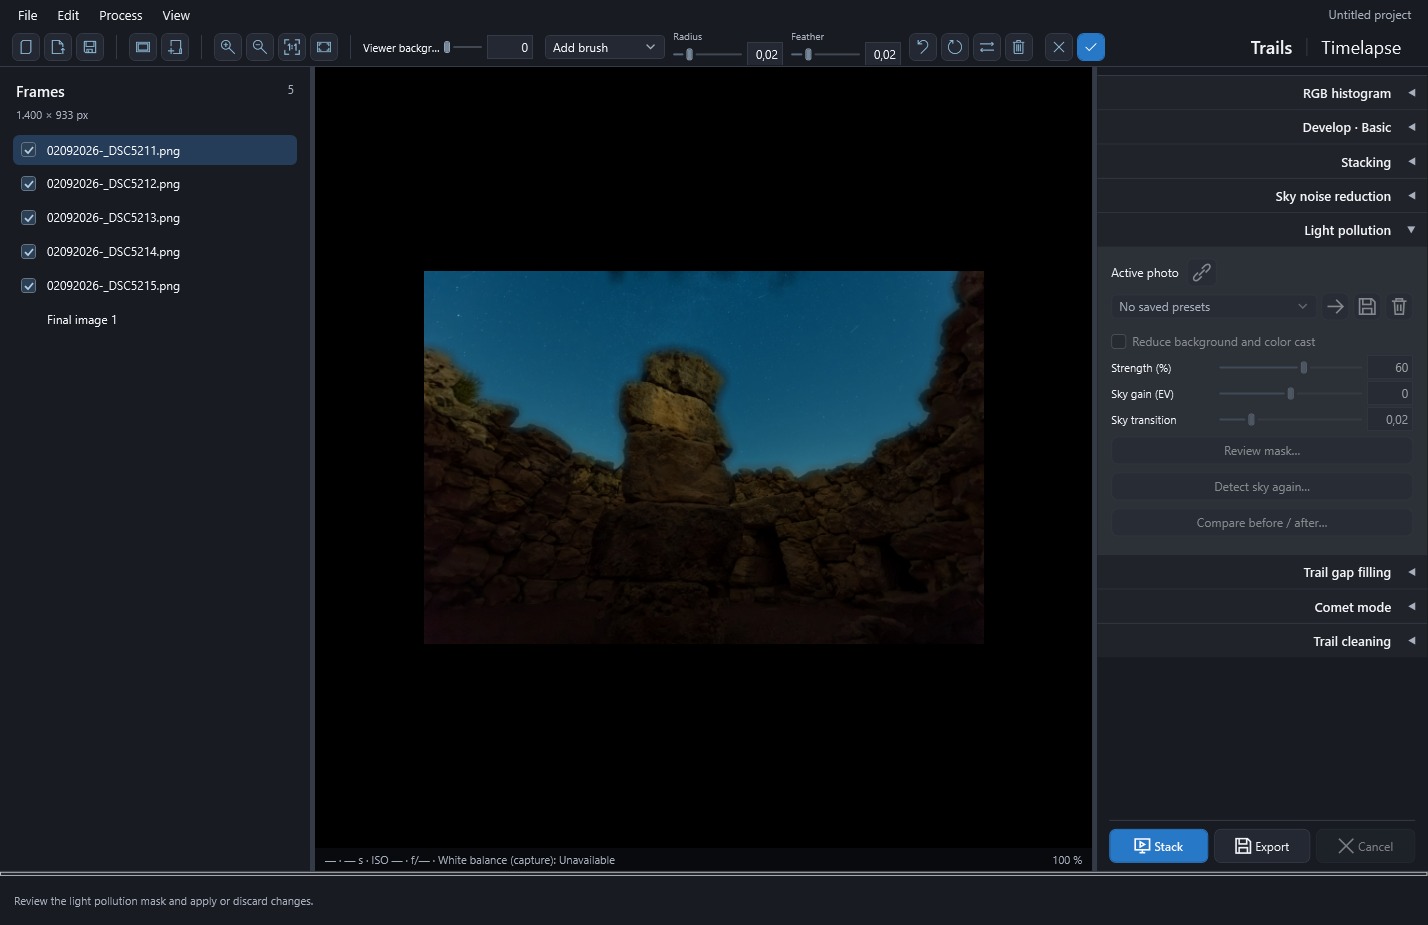
Review this mask in the main viewer. The toolbar above the image lets you draw a polygon, refine it with add and erase brushes, change radius and feathering, undo, detect again, invert or clear the selection. Finish with Apply selection to keep your changes or Discard selection to recover the previous mask.
Before applying, check whether pollution linking is enabled: if so, the mask will also be copied to checked photos. Disable the link to refine only the active photo. Applying a preset instead preserves the geometry of destination masks.
Inspect branches and leaves at 100% when reviewing the automatic sky mask: fine, low-contrast vegetation can still be included. Use Erase brush on vegetation and Add brush inside sky openings. Excessive feathering can spill across their edges.
The three pollution adjustments have different jobs:
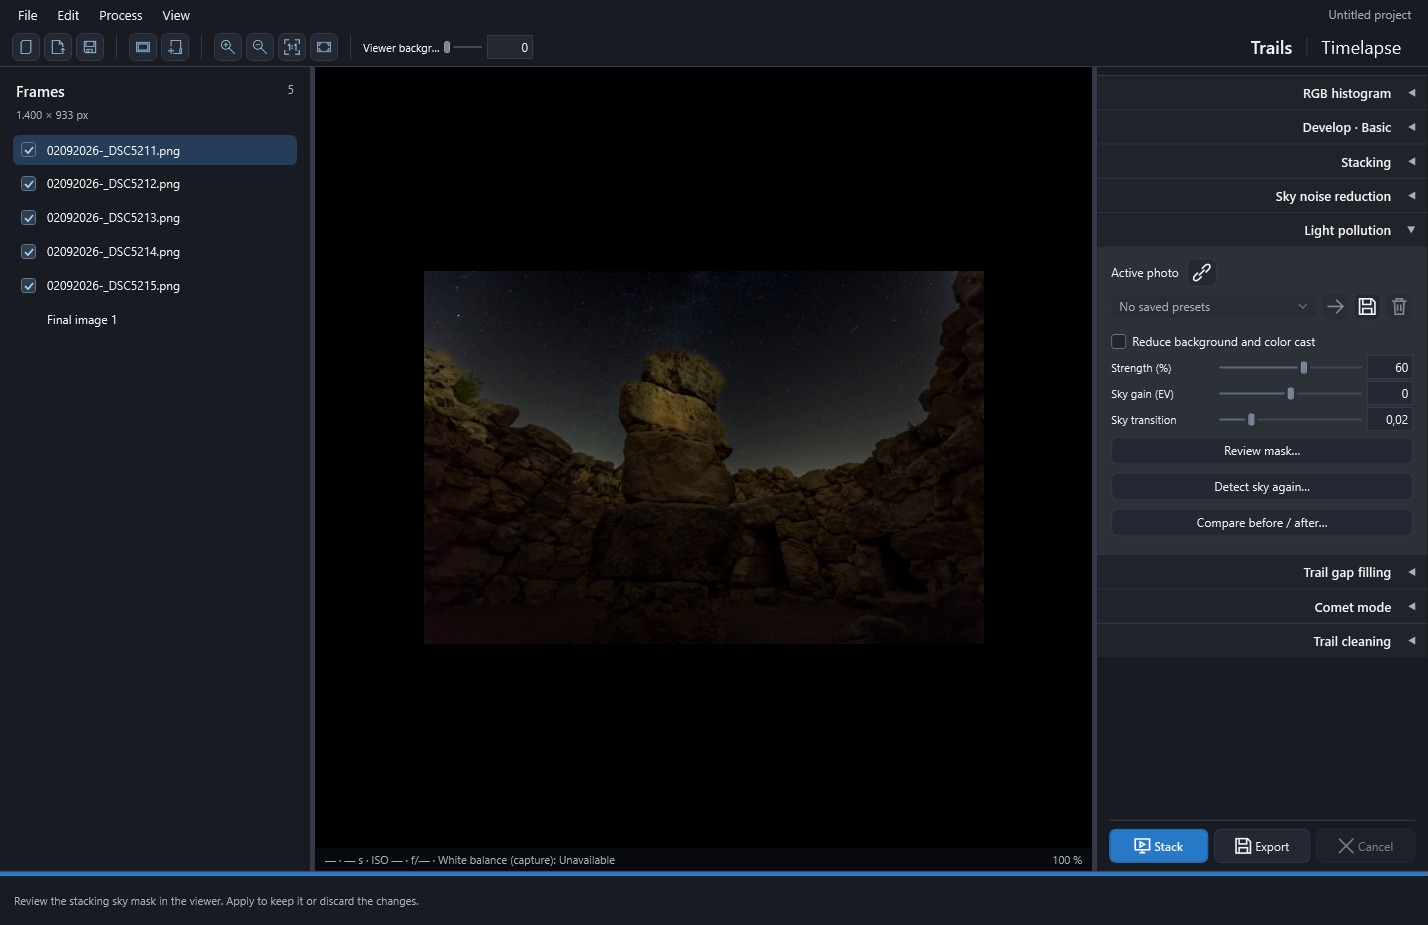
- Strength (%): how much background to subtract. It starts at 60; zero means no subtraction.
- Sky gain (EV): brightens or darkens after background subtraction. It starts at 0; +1 doubles the signal and −1 halves it. It still works at zero strength when the module is enabled.
- Sky transition: softens the correction's inner edge. A value of 0.02 means a radius of 2% of the image's shorter side.
All three values are saved in the project.
Find this correction under Trails → Light pollution or Timelapse → Exposure and flicker. It starts disabled and each module saves its own settings, so review them separately.
Select the photograph you want to adjust first. Enabling the link icon then copies its values and mask to checked photos and keeps subsequent changes synchronized. Disable it before adjusting only the active photo.
Choose Review mask… to inspect the automatic proposal. Correct rocks, trees and the horizon with the mask editor. Detect sky again… produces another proposal, replacing the stored mask only after applying. An empty mask returns to automatic mode. Adjust Strength (%), initially 60; zero performs no subtraction.
Compare before / after… displays the active photo at the selected strength even while the option is disabled. Enable Reduce background and color cast, then stack or regenerate the video preview. If no mask was reviewed, one is generated during processing.
The correction estimates a smooth RGB background in linear light and subtracts it less strongly near the mask's inner edge. When adjusting individual photographs, that estimate is made for each frame. The aim is to retain stellar signal above the background, although absolute star-pixel values can decrease because they also included light pollution.
Look particularly closely at the Milky Way, nebulosity and clouds: some of their structure can be interpreted as background. If detail is lost, lower strength before continuing. The pollution mask is independent of the reconstruction mask, although the renderer can reuse its sky proposal when the latter does not yet exist.
 Enlarge screenshot ↗
 Enlarge screenshot ↗
 Enlarge screenshot ↗