
Develop a photo or finish a stack
Development brings together adjustments to light, color and detail. You can use it at two stages:
- On originals, to prepare what enters the stack—for example, to match a color cast between photos. You will need to stack again afterward.
- On a Final image, to give that version the finish you like without repeating the calculation.
If a star was already clipped in the camera, lowering exposure will not bring back its lost color.
| Visual goal | What to try, in order | Signs of excess |
|---|---|---|
| A less orange or green sky | Start from As shot; then temperature and tint, or the eyedropper on a genuinely neutral area | Stars and landscape acquire the opposite cast. A polluted sky background is not necessarily neutral. |
| Brighten a dark photograph | Exposure; then Shadows to open the landscape, or select Ground to limit the change | Clipped stars or very visible shadow noise. |
| Retain bright stars while recovering the horizon | Reduce Highlights and adjust Whites before increasing contrast | Dull stars or halos around lights. |
| A deep sky retaining faint stars | Adjust Blacks moderately; watch the histogram and detail at 100% | Abrupt black patches and lost faint signal. |
| Emphasize detail or reduce haze | Texture for fine detail, Clarity for local contrast, Dehaze for haze | Grain, hard edges and halos near the horizon. |
| More expressive color | Try Vibrance before raising Saturation substantially | Flat, unnatural or clipped colors. |
| A monochrome interpretation | Choose the Monochrome profile or Black and white, then adjust contrast and endpoints | Lost separation between sky and landscape. |
Try profiles before fine-tuning color because they change the starting appearance. Auto tone helps explore a proposal, especially on a dark image; review it and adjust manually. To return to known values, reset the active region and check the settings of the other two regions too.
Brighten the ground without changing the sky
If the landscape needs light but the sky already looks right, select Ground and raise exposure or shadows there. For a different sky balance or contrast, select Sky. Whole image supplies the common adjustment: regional settings follow it, so a global change still affects both regions.
Inspect the mask before compensating for a selection error with sliders. A bright strip above trees usually calls for a selection or feathering correction rather than lowering the whole photograph's exposure. Use modest feathering on defined edges and enough transition to avoid an artificial seam.
Use your adjustments on other photos
The link copies adjustments to checked photos and keeps later changes synchronized. To use it:
- Prepare a photo that represents the series well.
- Choose Whole image, Sky or Ground.
- Check the destination photos and enable the link icon.
- Look at another photo near the beginning and end to see how it turned out.
- Disable linking before adjusting a photo on its own; otherwise the other photos change too.
A preset is a set of adjustments saved under a name. It lets you repeat a look in another project without moving every control again. It applies to the active region; review the mask if the framing differs. Choose its name and click Apply: selecting it in the list does not change the photo yet.
Where to find the controls
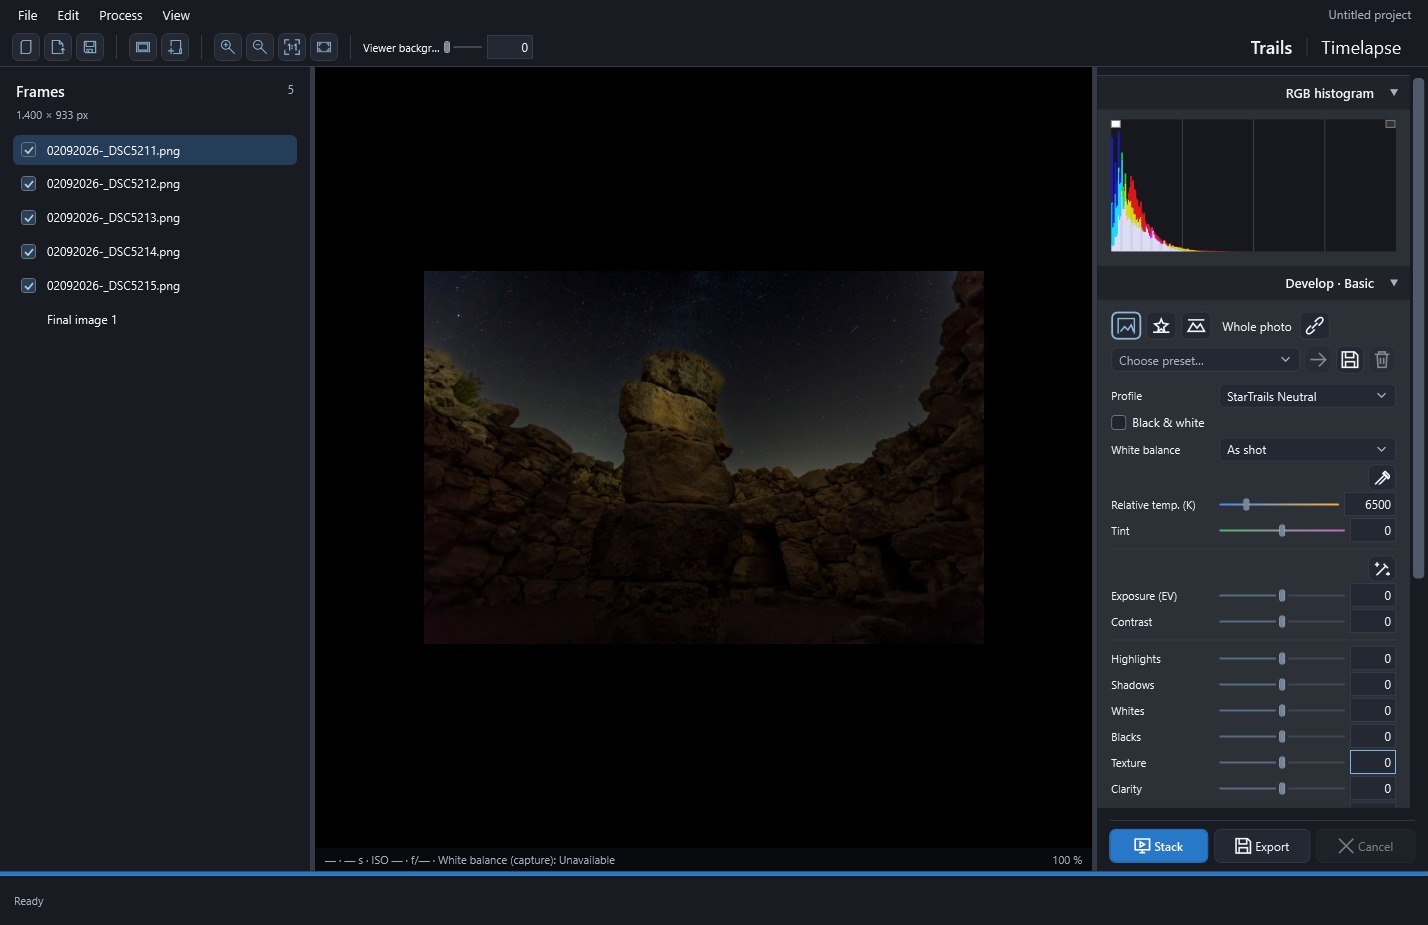
RGB histogram and Develop · Basic are at the top of Trails. They start expanded; click their headers to collapse them. Hover over a region button to see its name. Each development row has a label, a slider and a value you can type directly.
In Trails → Develop · Basic, you can start with the profile and white balance, move on to exposure and tones, then finish with detail and color. The table “What each development control does” explains the available adjustments. Try Auto tone for an initial suggestion, or use Reset development to restore neutral values in the active region.
Hover over a control for help. The link icon sits beside Whole image, Sky and Ground; follow “Use your adjustments on other photos” when you want several shots to share the same development settings.
To manage presets in Develop or Light pollution:
- Apply: choose a name and click Apply.
- Save: click Save settings as preset and enter a name. If it already exists, confirm replacement.
- Delete: select a preset and click Delete. It leaves the library without changing the photos.
Presets are stored on this computer and can be used in other projects. Develop presets affect the active region and retain the destination's capture white balance. Light pollution presets save activation, strength, gain and transition, but not mask geometry. With a link active, values also reach the checked photos.
The RGB histogram is a graph of the distribution of light and dark tones, with red, green and blue channels overlaid. It helps you see whether too many values are gathering at black or white; clipping indicators flag those extremes. It samples the sRGB view, including visible masks: hide them to judge the photo.
To locate clipped pixels in the selected image, press and hold either of the two small boxes at the top of the histogram:
- Left box — shadows: marks pixels with any RGB channel at 0 in blue.
- Right box — highlights: marks pixels with any RGB channel at 255 in red.
The warning stays visible while you hold the mouse button down. Release it to restore the normal image and retain the zoom. These marks are a viewing aid: they do not change your photographs, development settings or exports. They are calculated from the sRGB preview, rather than the original sensor values.
You can try the controls without each movement applying another adjustment over the previous one. The project retains your chosen values and uses them for both Trails viewing and export. Developing a Final image reuses its linear stack, while changes to the originals require a new stack to take effect. Timelapse has a separate exposure adjustment.
To adjust white balance, start with As shot to retain the original balance, or choose Auto from the dropdown to have the app analyze the image. You can also measure an unclipped neutral patch with the picker. Both the picker and the Auto tone wand have icon buttons whose names appear on hover.
Temperature runs from 2000 to 25000 K on a blue–amber track. For RAW, its label explains the source: Camera temp. uses Kelvin stored by the camera, while Est. temp. is calculated from white balance coefficients and the color matrix. The tooltip shows the capture value. When reliable metadata is unavailable, or you are editing the final stack, Relative temp. uses 6500 K as its reference.
Opening or resetting a photo preserves its initial appearance, and Kelvin synchronization retains each destination photo's own reference. When comparing with another converter, judge the image rather than copying its numbers: StarTrail Studio has its own algorithms and profiles, so values do not match Lightroom Classic.
When you open a supported RAW, LibRaw reads the sensor data and applies camera white balance without automatic exposure. This is why the first decode can take several seconds and the neutral result may appear darker than the camera JPEG. Compatibility depends on the camera model and compression variant; prepare each stack with photographs of matching dimensions and orientation.
RAW and all other supported inputs use the high-precision linear engine. Viewing at 100% and exporting both use native resolution, and TIFF can retain 16 bits per channel for further editing. RAW export is unavailable.
What each development control does
Select a photograph or Final image, then Whole image, Sky or Ground. Drag a slider or enter a value. Compare against neutral settings; Reset development affects only the active region.
| Control | How to use it |
|---|---|
| Profile | Neutral is a starting point; Color changes color interpretation and Monochrome provides a monochrome base. These are custom profiles rather than manufacturer profiles. |
| Black & white | Enable to remove color from the active region. |
| White balance | As shot retains the starting balance. Daylight, Cloudy, Shade, Tungsten, Fluorescent and Flash are presets. Auto estimates balance; Custom allows temperature and tint adjustments. |
| Picker | Click the icon and choose a gray or neutral area, avoiding clipped stars and colored lights. Click the neutral patch to select it and close the picker; Escape cancels. |
| Temperature and tint | Temperature adjusts blue–amber balance; tint adjusts green–magenta. The label identifies the Kelvin source; values do not automatically match other converters. |
| Auto tone | The wand suggests starting tone adjustments; review and edit them. |
| Exposure (−5 to +5 EV) | Changes overall brightness; avoid clipping bright stars. |
| Contrast | Increases or reduces tonal separation. |
| Highlights / Shadows | Adjusts bright and dark regions respectively. |
| Whites / Blacks | Adjusts tonal extremes; watch histogram clipping indicators. |
| Texture / Clarity | Changes fine detail or local contrast; strong settings can emphasize noise and halos. |
| Dehaze | Changes haze contrast; inspect the background and horizon. |
| Vibrance / Saturation | Changes color strength; Vibrance is more selective. This differs from cleaning or noise reduction strength. |
Tone, contrast, detail and color percentage controls allow −100 to +100. The histogram shows the sRGB preview: hide masks to assess the photograph. A clipping indicator reflects values at the preview extremes and does not replace inspection at 100%.
Whole image, sky, ground and synchronization
Edit the selection in the main viewer. Enable All photos to apply the same mask to every original in the project, including unchecked photos. Leave it off to save the selection only for the active photo.
When framing or the horizon changes between shots, add Detect per photo to obtain an independent mask for each photograph. In that case, edits to the active photo are not copied, so review the proposals. These two checkboxes determine how masks are saved; the link separately synchronizes development values between checked photos.
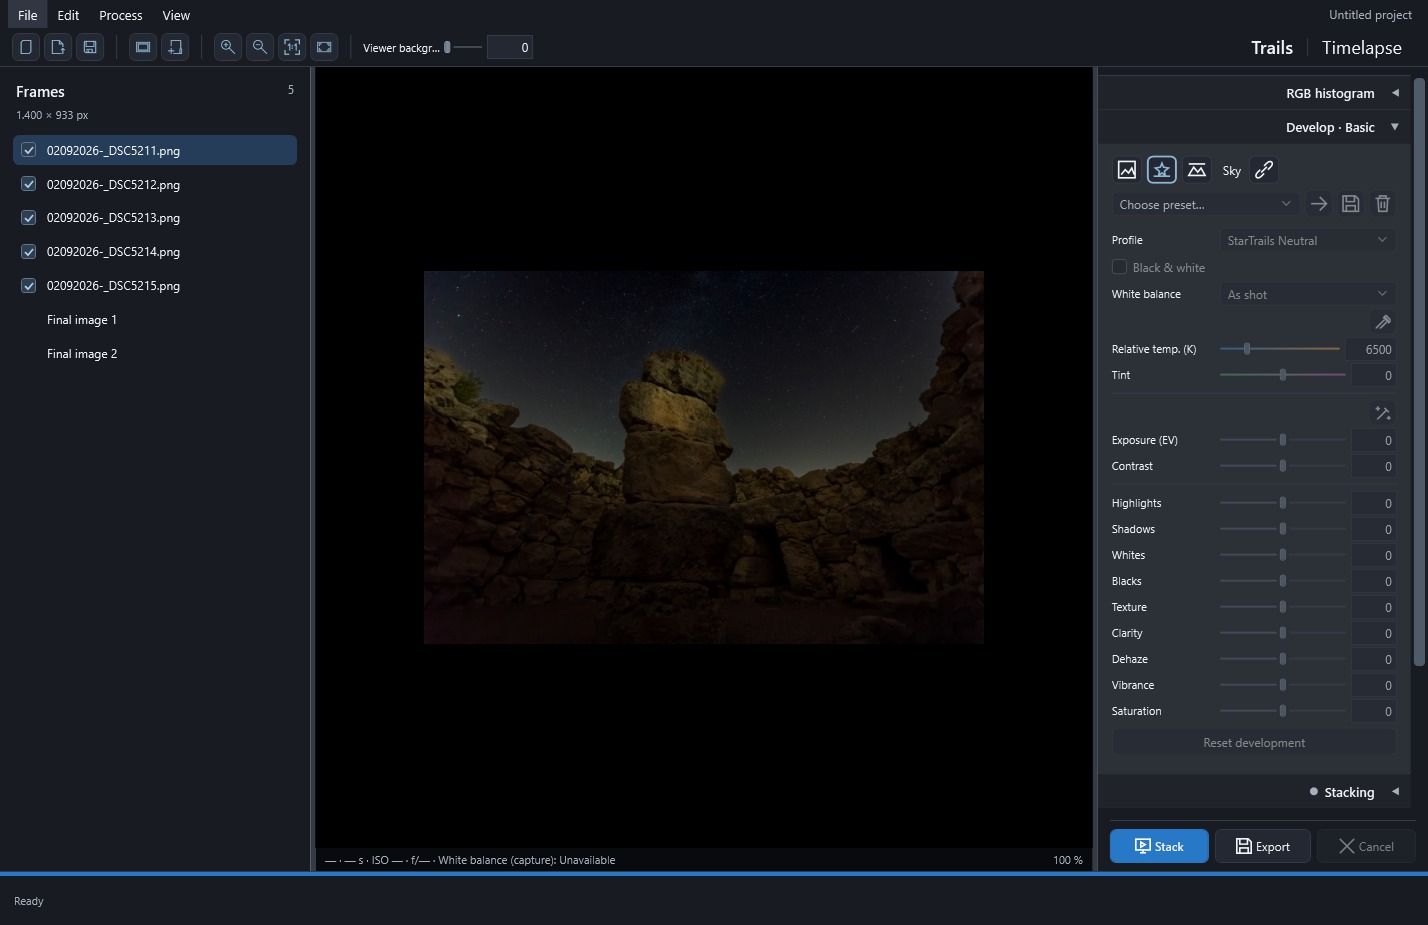
Use the three development icon buttons to choose Whole image, Sky or Ground. The highlighted border marks where you are working, and hovering over a button shows its name.
Each photo keeps independent settings for all three regions. Whole-image development is applied first, then sky and ground are blended using the shared mask and its feathered inverse. If there is no mask yet, choosing a region opens the editor so you can prepare one.
The link copies only the active region's settings and keeps other regions and masks. While it stays on, Reset also reaches checked photos. Develop and Light pollution links start off when you open a project.
Editing or synchronizing originals changes what will enter the next stack, so stack again to see the result. Final-image development is applied after that calculation and can be adjusted without repeating it; final versions also stay outside photo synchronization. If framing changes, check the mask too, since it belongs to the sequence's reference framing.
 Enlarge screenshot ↗
 Enlarge screenshot ↗